🀧 June July August


If you are a weekend gardener you may want to
consider covering your vegetable beds with
black plastic sheets (See picture right) to keep the weeds out of your garden.
To save your time and energy it is better to buy grafted plants from the local market than growing seeds indoors. Research shows that "grafted plants with strong root-stocks grow faster, provide fruits earlier and longer than non-grafted plants".
Many summer veggie, especially the grafted one will send roots deeper into the soil. A better way to provide these plants with an adequate supply of nutrients is to leave fertilizers in the trenches -- where they stay long for the plant to soak -- than spreading fertilizers around in the garden.
Dig 20 cm wide and 20 cm deep straight trenches in the garden bed. Spread manure, compost, and chemical fertilizer in the bottom of the trenches, and fill the trenches with fresh soil.
Build several rows of hills, and cover with black plastic sheets. Make holes in the black plastic, pour water and plant in the mounds. (See further instructions in Prepare Vegetable Bed).
Rainwater harvesting system:
Harvesting rainwater is free, environmentally sound, and perfect for plants. There are many creative ways to harvest rainwater, especially from the roof of your house. If you don`t have a roof over your head, and municipal water is out of your reach, protecting plants from burning sun during hot summer months become a challenge.

Project one: Buy big size plastic garbage cans, flip their lids, drill small holes in different places and tied lids at one end to the cans. (See the picture) Bury the cans halfway in the ground to collect rainwater. If you like you can make half bury above ground pools made out of colorful garbage cans! It all depends on your garden needs. Just make sure you cover them with their lids to discourage mosquitoes lay their eggs.


Grow Cucumbers:


Build 70 ~ 75 cm wide and 10 ~ 15 cm high raise bed.
Cover the hill with black plastic, and plant cucumber trees deep (up to the first two leaves for the stems to produce more roots) in the mound 40 ~ 50 cm apart.
Cover the hill with black plastic, and plant cucumber trees deep (up to the first two leaves for the stems to produce more roots) in the mound 40 ~ 50 cm apart.
Tie plants to canes to keep them upright. As they grow the plants will need additional support for their tendrils to climb.
Drive three stakes, one into the middle and two at each end of the hill. Tie two horizontal posts to the top and middle end of each stake driven. Stretch and tie a net (available in Home Center) between the posts.
The plants will climb the net and spread around as they grow big (See picture). Cut first 4 ~ 5 daughters (lower branches) from the main stem of each plant. Brunch cutting will help air circulation, sends more nutrition up for the plants to grow better crops. Wait for a month to harvest beautiful cucumbers!
The plants will climb the net and spread around as they grow big (See picture). Cut first 4 ~ 5 daughters (lower branches) from the main stem of each plant. Brunch cutting will help air circulation, sends more nutrition up for the plants to grow better crops. Wait for a month to harvest beautiful cucumbers!
In growing season sprinkle 30 gm fertilizer every two weeks around each plant and water well if bed soil is dried.
Harvest -- cut with scissors -- cucumbers when they are green and tender. Check vines regularly, pick cucumbers early, otherwise, they will grow big and stress your plants.
Grow Eggplants:

 Eggplants (see picture) are tropical trees, need very sunny and well-drained soil to provide good harvests. The fruits differ in size, shape, and color. Purple and black are the two common verities we mostly see in the marketplace, but eggplants can be a different size, shape, and color (green, pink, or white).
Build hills or rows 70 ~ 80 cm diameter and 10 ~ 15 cm high. Cover the hill with black plastic and set plants in the mounds 60 ~ 70 cm apart.
The plants will need additional supports as they grow branches and bear fruits. Drive three long stakes cross each other into the soil near each plant. Tie the stakes together where they meet (see picture).

Eggplants are tree-like woody plants, need pruning to provide bigger fruits. In a month or so suckers will develop along branches and stalks. If left alone they will make the plant bushy and produce smaller fruits.

When baby eggplants emerge, pinch out the terminal growing points of the stalks. Harvest the bigger eggplants down first, leave the smaller ones up. When smaller ones grow big to harvest them by cutting original branches just before the new suckers. The new suckers will grow and produce new flowers and fruits. Continue harvesting by pinching terminal growths and pruning.
Get a second harvest!
In winter eggplant trees will die off. If you are lucky, you may get a second harvest in the fall.
In the first week of August, prune about half of all old branches. With a shovel dig 20 ~ 30 cm deep holes, 30 ~ 40 cm away ( It`s ok to cut some roots. New roots will develop later) from each plant along the hills. Toss 20 gm of chemical fertilizer in each hole, water well and cover the holes with fresh soil. In a couple of weeks, plants should send young shoots, mostly from the bottom of the tree. The shoots will bear fruits, and you should have tender eggplants again in fall!

 From sweet, crisp peppers to mild- hot jalapeno to super-hot habaneros (organic bug-busters), and many other verities, chill, and peppers are of the same species. Both need long

Grow Peppers:

hot days as they grow and change colors from green to yellow, to orange, to red.
Grow assorted varieties of chill and peppers in pots, planters, or directly in your garden.
Prepare seedling beds as mention above, and for more information see: Prepare Vegetable Bed. Plant chili / pepper trees 40 ~ 50 cm apart.
Grow assorted varieties of chill and peppers in pots, planters, or directly in your garden.
Prepare seedling beds as mention above, and for more information see: Prepare Vegetable Bed. Plant chili / pepper trees 40 ~ 50 cm apart.
As plants grow they will send branches in different directions.
Pinch off or cut a few lower branches (suckers) below the first flower and harvest some fruits early -- even they are not mature -- to help plants preserve energy for a better crop.


Grow Okras:

Sow okra seeds indoors (see: Grow seeds in Pots) or outdoors (see: Make a Seed Bed) in May.
Prepare and fertilize seed beds as mention above (see: Prepare Vegetable Bed).
Set okras seedling 20 ~ 40 cm apart.
Okra plants mostly grow vertically and can get 100 to 200 cm tall if not prune!
Small vegetable gardens can be beautified by growing okras that produce hibiscus-like flowers in the middle of low-lying ornamental flowers, herbs, vines, such as pumpkins, sweet potatoes, etc. Make sure to keep the vines out of your walking area as they spread!
Okras are tree-like woody plants, strong enough to hold their pods without external supports. Stake them if your garden gets lots of regular wind.
With a pair of scissors cut off lower leaves, suckers, and fruits to help plants preserve energy for better crops on the top.
 In growing season pods will keep on coming, and you need to harvest them before they get hard. Wear gloves, feel the pods by gently push your thumb on them. If pods feel soft they are good to harvest. The ideal size is less than 10 cm long! To preserve energy for new fruits cut off any hard okras and lower leaves.
In growing season dig shallow trenches along the hills, and sprinkle (every two weeks) chemical fertilizer, cover with soil. With proper care plants should provide you with an abundant supply of okras!
You can preserve okra -- wash, remove extra water, put them in Ziploc –in a freezer for about six months.
Set okras seedling 20 ~ 40 cm apart.
Okra plants mostly grow vertically and can get 100 to 200 cm tall if not prune!
Small vegetable gardens can be beautified by growing okras that produce hibiscus-like flowers in the middle of low-lying ornamental flowers, herbs, vines, such as pumpkins, sweet potatoes, etc. Make sure to keep the vines out of your walking area as they spread!
Okras are tree-like woody plants, strong enough to hold their pods without external supports. Stake them if your garden gets lots of regular wind.
With a pair of scissors cut off lower leaves, suckers, and fruits to help plants preserve energy for better crops on the top.

In growing season dig shallow trenches along the hills, and sprinkle (every two weeks) chemical fertilizer, cover with soil. With proper care plants should provide you with an abundant supply of okras!
You can preserve okra -- wash, remove extra water, put them in Ziploc –in a freezer for about six months.
Grow Tomatoes:

Vegetable Bed. Sprinkle 30 gm of phosphorous per squire meter.
When you plant tomatoes, plant them a bit deeper (10 to 15 cm deep and 50 ~ 60 cm apart) than other plants. Deep-planting will develop new roots from buried stems that will support and soak up more nutrients for the plant for a better harvest!
Drive long posts straight into the soil near the trees and each end of the beds. Tie horizontal posts with vertical posts to make the structure strong. Stake tomato plants to the posts.
As plants grow they will send branches (suckers) in different directions. Pinch off or cut all the suckers, (see picture below) let the main stem bear flowers and fruits.
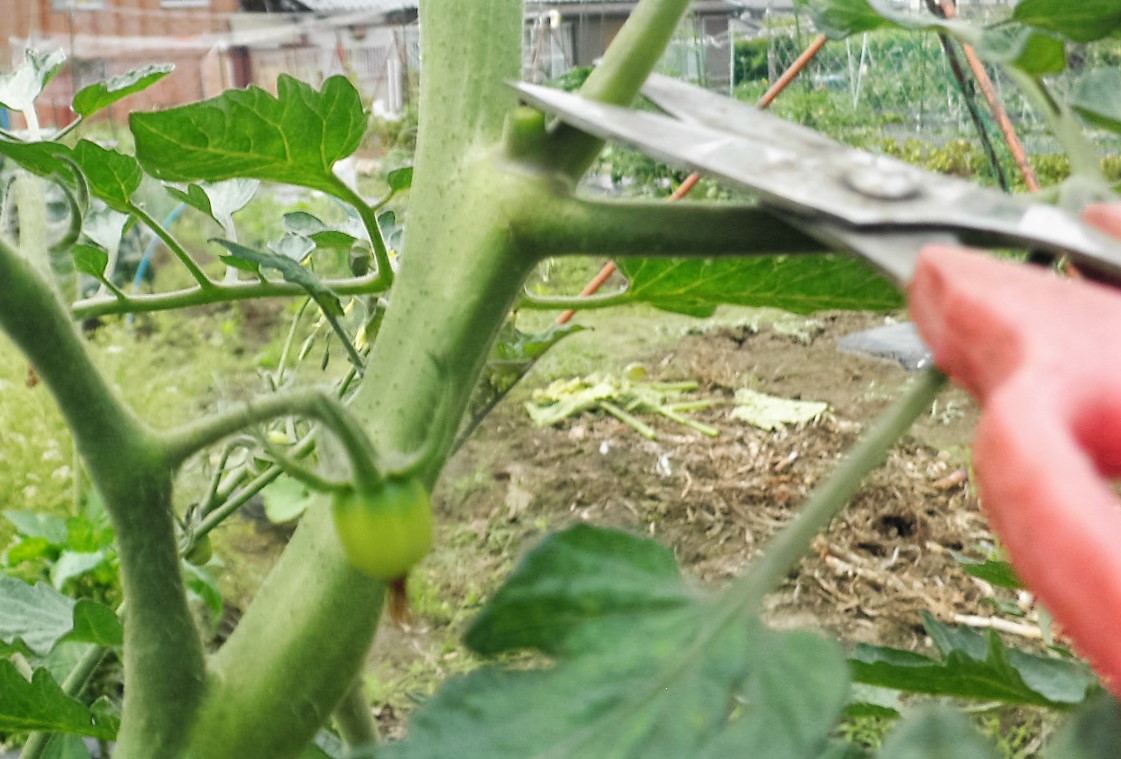

Big daughters double your yield!
You should have one branch (the daughter) and the main stem (the mother) in each plant, pinch off all other suckers.
Stake both mother and daughter separate them (Don`t let them hug. Ha! ha! ha! It`s cruel, isn`t it?) from each other like a big U.
Sprinkle 20 ~30 gm of all-purpose fertilizer per square meter along the rows or hills every month during growing season.
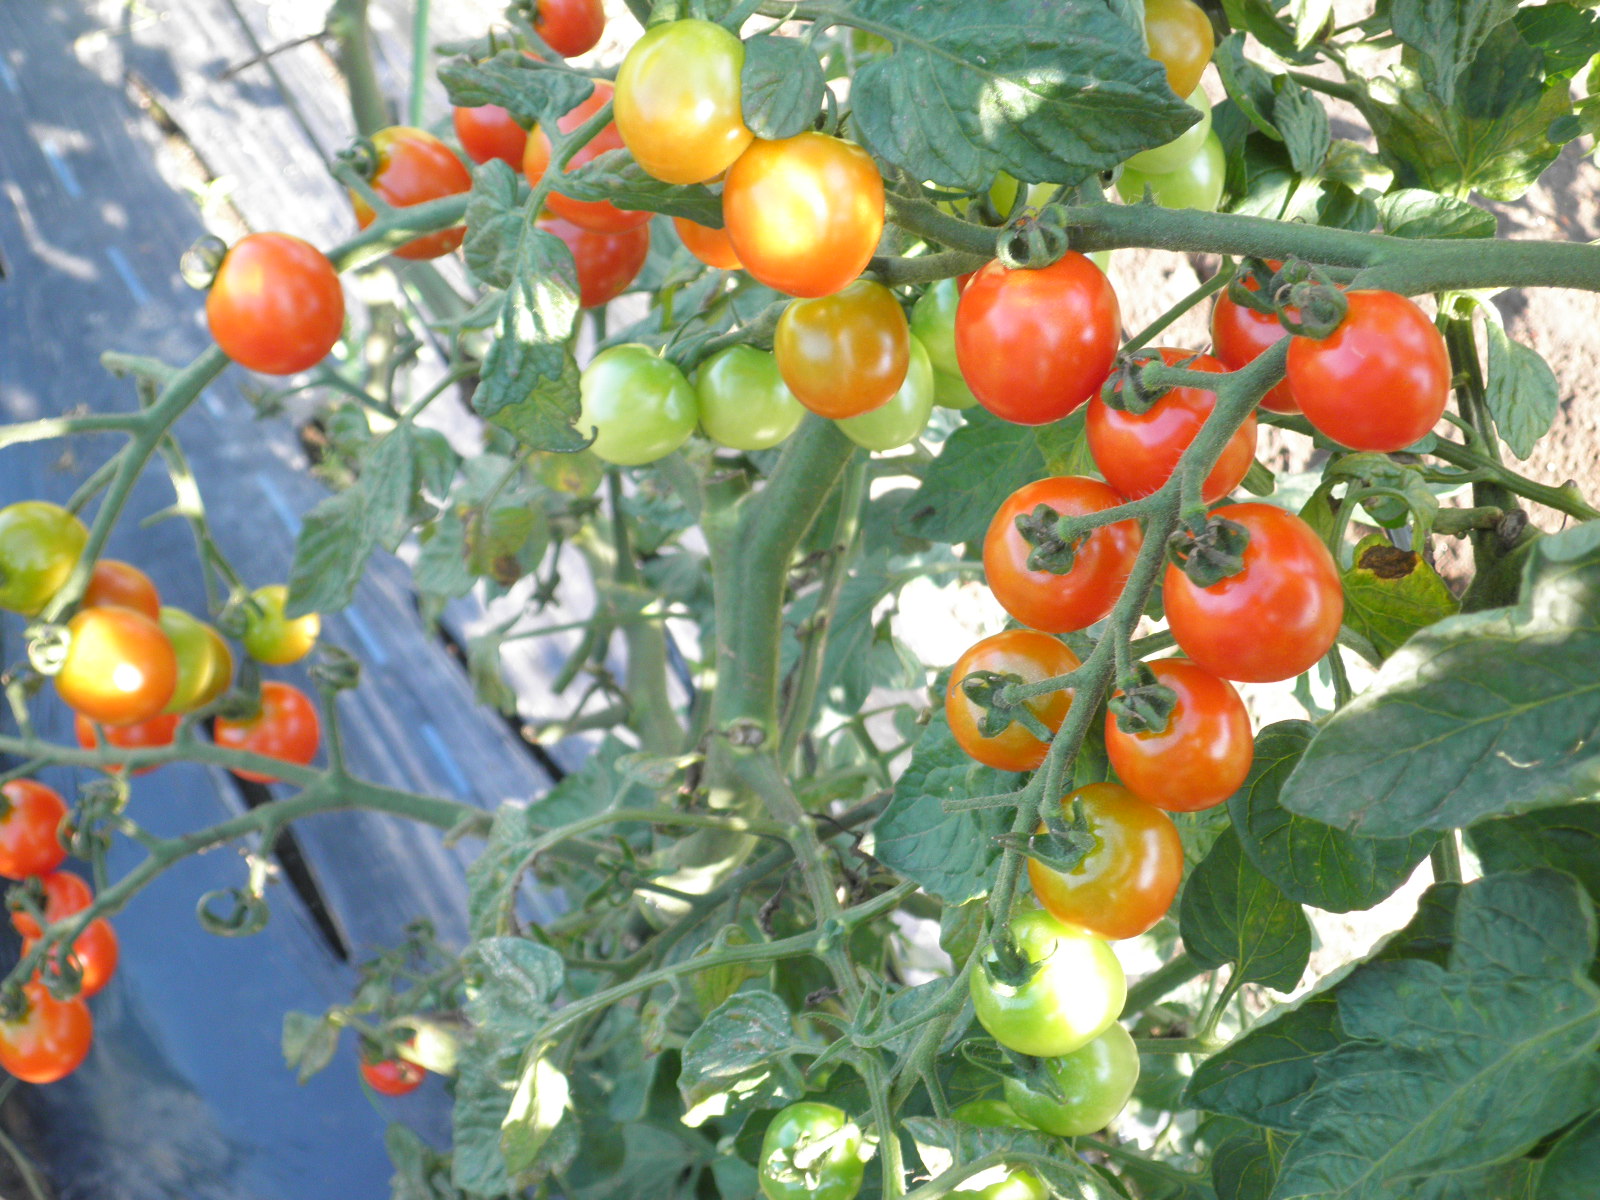
How to extend harvesting:
 When green tomatoes start to emerge cut all leaves down. Continue cutting lower leaves as more green balls come. Do not cut upper leaves that plants need to harvest sunlight. Leaf-cutting let plants preserve nutrition and diver it to fruits. The plants should look like canes with leaves on their tops. If the plants get too tall to reach, tie them to strong strings, and lower the strings as you cut their leaves. Harvest should last until late fall. This year (2016) I harvested tomatoes until mid-December. I wished I could save those green tomatoes that were damaged by frost! Lesson learned: It is possible to grow tomatoes in a greenhouse that keeps the temperature around 10 C in winter.

Pop freshly picked sweet tomatoes in your mouth! Enjoy!

Grow Sweet potatoes:
If sweet potatoes could speak, I think they would say `listen, man, don`t drive me too far! Just drop me here. You can pick me up later, OK?` What I mean is, sweet potatoes probably are the easiest crops to grow. They will root as long as the ground remains wet. (I threw out some slips in a rainy season when they rooted, I covered them with soil ). Sweet potatoes are heat-loving tropical plants. As long as the weather remains hot and humid, the plant will produce good crops even in imperfect soil.
The plants don`t need much feeding and watering either. They are more drought and disease resistance than many other crops we grow in our garden. In fact, too much feeding will produce many leaves, smaller crops.
Unlike many other veggies, sweet potatoes don`t grow from seeds. They are grown from slips – the developed sprouts from the mother potatoes. Growing slips from tubers take time, and they may not satisfy your needs. For home gardeners, the better option is to buy mature slips from garden centers or nurseries.
To get enough roots, lay sweet potato slips in shallow water in a tray. Make sure that the upper leaves don`t submerge in the water. In about two weeks the slips should develop new roots. Unlike many other veggies, sweet potatoes don`t grow from seeds. They are grown from slips – the developed sprouts from the mother potatoes. Growing slips from tubers take time, and they may not satisfy your needs. For home gardeners, the better option is to buy mature slips from garden centers or nurseries.


Make a loamy, well-drained bed. Spread and mix 100 gm of 10 - 10 - 10 fertilizer and 20 gm of phosphorous per square meter. Make 30 ~ 40 cm tall and about 80 cm wide raised beds.
To warm the soil, cover the beds with black plastic mulch two weeks before planting.
With a long chopstick make 45°angle holes through the mulch every 30 ~ 40 cm apart. Plant (pass) slips (preferably in mid-May) about half in the mulch holes, bury the roots by lightly tapping and squeezing the mulch with your fingers. Water well until the plant's root and send leaves.
The plants will produce lush vines that may cover a large area. Turn vines over (see picture) to stop them rooting and taking over your garden space. Turning vines will send more nutrients to the primary crowns for better and bigger crops.
In the fall do a test digging, if tubers are small, wait until the vines begin to turn yellow. Harvest sweet potatoes by digging and pulling up the primary crown from the mulch.


taste better if left to cure at least for two weeks. Don`t wash sweet potatoes until right before you use them. Store sweet potatoes in a place that is dry, cool, and dark. In cold climate sweet potatoes can be preserved for eight months!
Grow Watermelons:

Sweet, juicy homegrown watermelons are great treats in hot summer days. Watermelons vary in shapes, sizes, and colors. They demand lots of heat to grow sweet juicy fruits.
You can grow watermelons from seeds or buy nursery plants from the store.
Select a place that gets plenty of sunlight, and lime the soil if needed.
Dig straight trenches, spread 2 kg mix of manure (80 %) and oil cake (20%), and 30 gm of phosphorus, 100 gm all-purpose fertilizer per square meter in the bottom of the trenches and fill the trenches with fresh soil. Make rows or hills and covered with black plastic mulch to warm the soil.Select a place that gets plenty of sunlight, and lime the soil if needed.
Make holes in the mulch 100 m apart, pour water, and plant watermelons in the mounds (see instructions in Prepare Vegetable Bed).

To suppress weeds and keep watermelons from direct contact with soil put mulch around the plants.
Watermelon vines produce more male flowers than female flowers – the one with a small swelling at the base. Bees and bugs -- most active in summer morning when most flowers are in full bloom -- should cross-pollinate watermelons flowers. You can cross-pollinate your watermelons flowers by pinching off a male flower nearby and let it touch the female flower. If cross-pollination succeeds, female flowers will stay on the vine to bear fruit.
When a fruit is about the size of a Table Tennis ball, place it on a board (make a hole in it) to prevent direct contact with soil. Watermelons will rot if the boards collect water.


Watermelon vines overwhelming your space?
Well, the sky is your limit! You can train the vines to grow vertically by attaching them to nets, posts or any other trellis. The trellis may not support big watermelons that get too heavy. The small variety of watermelons are the best choices for vertical gardening. Support watermelons with old stockings or net hammocks when they are about the size of a Table Tennis ball. (See picture).


Grow Pumpkins:

Pumpkins vary in shapes, sizes, and colors. The smaller pumpkins can be as small as an apple, and bigger ones could be too big to lift or hug! In North, America pumpkins are used mainly as Fall decorations (especially, in Halloween) rather than human consumption. In Asia and other parts of the world, pumpkins -- because of their size and sweetness -- widely consume as a favorite vegetable.
You can buy nursery pumpkin plants, but growing pumpkins from seeds outdoors or indoors are easy and inexpensive.
If you have limited space, plant pumpkins at the edge of your garden. Choose spots in different corners what get plenty of sunlight.You can buy nursery pumpkin plants, but growing pumpkins from seeds outdoors or indoors are easy and inexpensive.
Pumpkins plants need a lot of feeding -- sunlight, nutrients, and water -- to grow great fruits. Dig 40 cm depth, 50 × 50 cm squire holes and fill them with manure, fertilizer, oil cake, compost mixture (if available), phosphorous (sprinkle), add fresh soil and mix well with a shovel or fork. Water the holes and mound each hole with fresh soil.
Cover each squire mound with a black plastic mulch. The mulch will worm the beds for the seedling to grow quick
Wait about a week before planting. Cut mulch and sow three pumpkin seeds in each hole in mid-May. The plants should germinate in 3 ~ 7 days in right soil temperature. When plants grow four or five leaves cut all, but one health plant in each squire. (See picture).
Don`t let pumpkin patch take over your garden! My experience is that uncontrolled pumpkin patch not only takes up your garden space but produce small fruits -- most will die before mature. To allow the plants to concentrate more energy on fruits, snip off mothers just before vines begin to run.

Pumpkin vines bear both male and female flowers (see picture). Cross-pollination of pumpkin flowers is same as watermelon flowers.


Pumpkins should mature between 70 - 90 days. Harvest pumpkins with a knife when they feel hard and sound hollow. Dry pumpkins for about a week or so and let them cure. Store them in a cool and dry place. With proper care, pumpkins can be stored for about six months. Stored pumpkins seem to taste sweeter -- "concentration of sugar increase when they are dried and stored"-- than freshly picked pumpkins.
Eat pumpkins fried, boiled, baked, make pumpkin soup, pie, other sweet dishes. 
Like watermelons and other vines, most small pumpkin can be trained up a trellis. (See picture)

Ho, ho, ho, where are you all going!!

Like watermelons and other vines, most small pumpkin can be trained up a trellis. (See picture)

Ho, ho, ho, where are you all going!!
Grow peanuts:

Growing peanuts is fun. You can grow peanuts in a container, or directly in your garden. Peanuts are heat loving plants.
They will thrive in loose and well-drained soil that gets full sun.
Peanut seeds will not germinate indoor in temperature below 20 degrees Celsius. Buy peanut seeds or use unroasted dried peanuts if you have some. Break the shells -- breaking shells will remove the barrier for the seeds to germinate early -- gently. Don`t break or remove their coating from the nuts.

Sow three seeds (preferably in mid-May) directly into the holes 40 to 50 cm. apart on a raised bed covered with a black plastic sheet. (See how to prepare and cover seed beds in Spring Veggie). Make sure to keep the soil moist until the seeds germinate in about a week or so.
When three to four leaves appear thin plants (cut the top of the plants with scissors), leave the strongest one at each spot (See young peanut trees above). Remove black plastic sheet by gently digging and pulling it out of the bed.

In about three months after planting peanut trees will spread, sending green leaves and yellow flowers!


John Green. All Rights Reserved
No comments:
Post a Comment