♨ March April May

Great way to get a head start in spring planting is to sow seeds indoors, and transplant the seedling outdoors in prepared beds as soon as the danger of frost has gone.
With some special efforts described below vegetable, such as broccoli, cauliflowers, cabbages, lettuce, turnips, spinach, and other leaf verities can be started outdoors for early spring harvest.
pupa stage is one of the coolest stages of a butterfly’s life. As soon as a caterpillar is done growing and they have reached their full length/weight, they form themselves into a pupa, - See more at: http://www.thebutterflysite.com/life-cycle.shtml#sthash.ncc1GKcB.dpuf
Garden Tools:
With basic knowledge and right tools, gardening chores are not back breaking hard job. The hard part is, to chose the right tools to do the right jobs. To cultivate a large space using power equipment and machinery might be the right a choice to do even that needs some initial investments, but most home gardeners in many countries still prefer hand tools that are easy to use, relatively inexpensive, environmentally-friendly, and that don't require fuel and extensive maintenance.
Shovels, spades, forks, hoes, rakes, and trowels are the basic tools most people use in their gardens. Since garden tools vary in the width, depth of the scooping blades, and length of the handles. Buy the ones that are the right size, and the ones you feel comfortable to work with.
Tools with longer handles and good grips provide leverage and reduce stress on muscles.
Both shoves and spades can be used for digging and removing soil, but for digging trenches, remove sod, and making straight edges, spades do a better job!
Use hoes and forks to break up large clumps of soil, remove stones, rocks, sticks, debris from the garden.
Level garden beds with rakes, (a lightweight, easy-to-use cut PVC pipe can be used for smoothing the surface of the beds ) for seeding and planting.
You may want to buy a top-quality trowel, the most basic, often-used garden tools for digging holes, removing soil, and planting seedlings.
Buy pruners for cutting woody plants, a pair of scissors for cutting, trimming soft branches, and harvesting fruits.
You may need a wheelbarrow to carry things around your garden.
If possible buy quality garden tools. Don`t leave garden tools outside in rain! Clean and store them properly after use.
Prepare Vegetable Bed:

Remove sod and weed by spade. Dig -- use your foot to push blade of the shovel into the soil, lift and toss the load around. With a fork break down all clods. Check ground pH level by inserting a Soil Test Kit (See picture. Available one online or in garden center) in different places on the bed. The ideal pH range for soil is from 5.5 to 6.5. If a soil test indicates a pH below 6.5, sprinkle 90 -120 gm ground limestone per square meter by hand over the freshly-dug surface (See picture). Be sure to wear masks, goggles, gloves and other protective gears. Lime raises pH level of the soil by reducing the acidic reaction increase by chemical fertilizer, manure, heavy cropping, and too much rain.

After liming wait for a week to let the lime sinks in and dissolve in the ground before applying manure and fertilizer.

Scatter 100 -120 gm, 14 -14 -14 (use, less) or 10 - 10 - 10 all-purpose fertilizer (See picture) and 1 kg of manure or compost per square meter over the plot. To covers, the surface evenly does a light layer on your first pass, and then add some more fertilizer once you’ve covered the entire ground.

Create 15 - 20 cm tall, and 80 ~ 90 cm width raise beds with walking spaces in between. (See picture).
Wait for a week for the chemical to settle before planting.
Black plastic sheets:

Many veggies grow better in beds covered with black plastic sheets. Lay black plastic sheets on the beds, cover the edges with soil as you walk over them. Make sure no gaps between sheets and the beds are left.
Plastic sheets heat the soil, kill weeds, and keep the beds moist. With a box cutter knife make several straight cuts on the sheets to add extra fertilizer -- plants would need later on their growing season — and for water penetration. ( See picture)Make a Seed Bed:

Make a seedbed that is loose, and easy draining for the seedling to penetrate the soil.
Choose a 3 square meters (1 × 3 m) area, and make a 15 -- 20 cm tall raised bed.
Spread 90 kg of grind red and 60 kg pot soil evenly over the ground.
Remove leaves, sticks, woods if there are any.
Use a rake, work on a push-pull method to gently mix the soil. Level the bed surface with a cut PVC pipe. Water the bed well before planting.
Covered the bed with black plastic sheets (if the soil is warm, you may not need to cover the bed) and slit the plastic sheets with sharp scissors in different locations. Sow seeds in the openings of the sheets, water thoroughly.
You can lay a fleece loosely -- keep room for the seedlings to grow -- over the seedbed, and secure the edges with bricks or water bottles. Fleece will keep the beds moist and protect developing seedlings from frost, sun, wind, and deter bugs and birds.
In cold climate, you may want to use plastic tunnel cloches over the seeding bed to increase the temperature for the seedling to germinate early.
Make Compost:

Put three layers of green materials -- kitchen waste: vegetable, fruit peelings, crushed egg shells, bones, tea leaves, coffee grounds, etc. and one layer of dry brown materials: dry leaves, newspaper, paper, paper towels, tissue paper, cut cardboard packaging, wood chips -- in the bin until the compost bin fills up completely.
Cover the bin with the lid, the composting process will start.
Wait for two weeks, the waste materials will decompose and lower. Add in more materials, and continue the process until the waste no longer lower.
Cover the bin and wait until the materials completely decompose. If the compost smell, add in more brown materials and keep the lid open. To accelerate the composting process you may use Bokashi that comes with a price tag!
Be sure to covering the top of the bin with a wire mesh or net to discourage birds and animals from picking on the garbage.
I unload and spread compost over my garden once a year in winter.
Grow Seeds in Pots:

Buy a bag of grind red soil and a bag of pot soil. Make a 30 - 70 mix of red and potting soil by hand. Use a colander to separate the wood, sticks, leaves, etc. from the mix. Potting mix is the strained soil collected under the colander.
Pack down the soil slightly, and place the pots in a tray of water.
Sow seeds once the pots` soil feels damp. For very fine seeds drop six or seven seeds in the middle of the pots and cover the seeds with layers of fine soil.
For bigger seeds (peas, beans, etc.) bury three seeds as deep as they are and cover them with soil. Water the pots slightly, throw away extra water in the tray.
Put the tray in a cardboard box. Cover the box with a clear plastic sheet (punch small holes for air circulation), and put box by the window or in a warm place (See picture). Keep the box warm until seeds germinate, and grow for transplanting outdoors.
To prevent root rotting do not over water. Feel the soil, put your fingers in the pots, if the soil is moist the seedlings don`t need water.
Seedlings don`t need much feeding. Potting soil has enough nutrient for the young plants to grow for a couple of months. If needed use diluted liquid fertilizer.
Thin seedlings with scissors, and leave a single, healthy plant in each pot be transplanted to garden beds or larger pots later in the season (See picture below).


Best Way to Garden?


Here`s something to remember:
- Arrange plants and see how they look in their new beds before planting. Climbing vegetable, such as cucumbers, squash, pumpkins, melons, peas, beans, will spread fast, and deprive light by creating shades from non-climbers. If possible, plant climbers and non-climbers separately in different locations in your garden. See picture, potatoes, cabbages, and onions are planted together for sunlight.
- Provide plants with more light, water, and compost, less chemical. With light and water, many plants do just fine in a land filled with compost and other organic materials.
- Don`t sow seeds, especially the fine ones in or before rainy days. Rain will wash them off.
- Don`t plant trees in a hot-mid day, plant them in the afternoon. A cloudy day or a day before or after rain is a great day for planting vegetables. Check the weather before planting. Heavy rain and hot sun will damage your plants.
- Protect plants from heat, cold, bugs and animals. The net (see picture) I bought years ago paid for itself by saving my money on pesticides and sprays.

- Remember, some plants will die for no apparent reason. The other will damage by unexpected pests, animals or late frosts. It`s good to raise more plants than you need, and hold some back when planting out to ensure that you have enough supply to replace the damaged ones.
- Do n`t cram your garden with extra plants, transplanting plants too closely will reduced production, cause disease, and invite insects.
- Don`t spray pesticides when plants bear fruits. There are no `safe levels` for pesticides when we consume food, including vegetable.
- Be sure to remove all stones and other hard debris from the bed before planting, especially for root vegetable.
- To avoid deformation, root vegetable, such as carrots, daikon (radish), beets, turnip, etc. should not be transplanted to a new location.
- Overuse of chemical fertilizers, pesticides, and buying expansive garden tools are for commercial farmers who have a hungry world to feed, not for us people who enjoy working the land to grow fresh vegetable for our family and friends.
- Ensure that you're neither over fertilizing nor under fertilizing your plants. If in doubt, start with less and gradually increase the amount. You will get the hang of it in a year or two!
- Practice crop rotation for success. Rotate planting sites every year if possible.
- Your green thumb will grow as you grow your veggie!
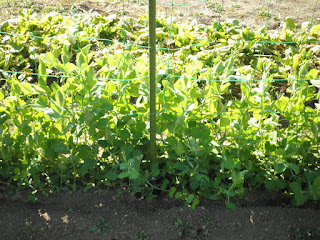
Grow Peas:

Sow 3 ~ 5 pea seeds in pots, or 30 cm apart in the ground in early spring (or late summer for spring harvest) when the soil still remains warm.
Cover the seeds with dirt and pat the dirt down. Net to keep the hungry bird out and water thoroughly.
Never let pea bed dry until the seeds germinate. Thin out seedlings to two or three, once they are established. (See picture)
Be sure not to fertilize peas too much. If you do, you will get lots of leaves, a few beans.
In the growing season, sprinkle 20 gm of fertilizer per square meter around the plants.
 Harvest peas early when they are still tender.
If you like green peas wait until the pea pods get hard. Remove vines when they get yellow (see below).
Sautéed peas:
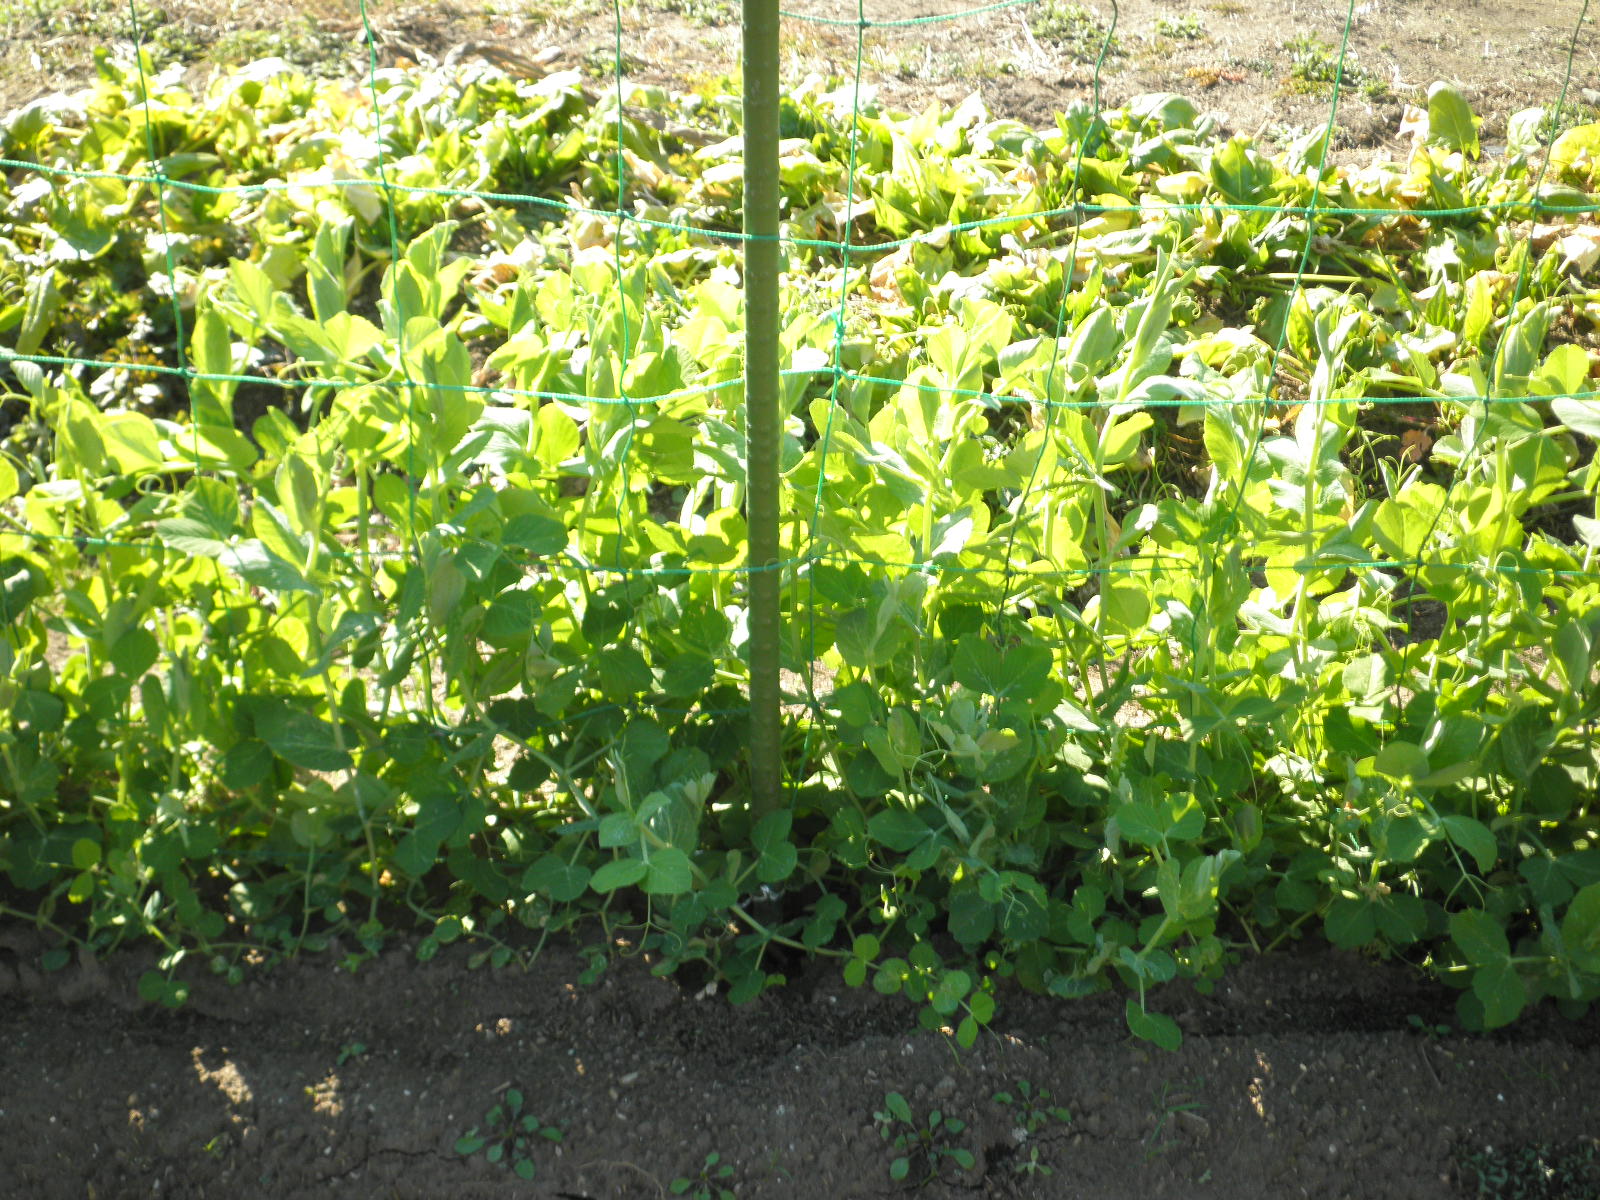
As plants grow, the stems need support. Set the stakes and nets for the vines to climb ( See pictures).
 Harvest peas early when they are still tender.
 If you like green peas wait until the pea pods get hard. Remove vines when they get yellow (see below).
Sautéed peas:
Remove string from the peas and sauté them in butter for 3 minutes. Sprinkle salt, pepper and garlic powder (if you like). Your sautéed peas are ready. Enjoy!


Grow Broccoli and Cauliflower:


Net to keep the bugs out. (See picture above). When cauliflowers` heads reach about the size of a tennis ball pull up leaves and tie them loosely around the heads to keep the sun off the heads. ( See picture).
To create full, healthy heads sprinkling fertilizer around plants every two to three weeks during growing season. Broccoli, lettuce and some others leaf vegetable are "cut and come again" crops.
When you harvest broccoli just take the heads, leave the tree on the ground. The added bonus are smaller heads on side shoots that grow later! (See the picture). Pinch off the heads of "Stick" broccoli to get a bumper harvest in spring! Harvest broccoli and cauliflower in early spring before they grow flowers.


Grow Cabbage and Lettuce:

Cabbage and lettuce vary in size, shape, and color -- red, purple, and green. Green cabbages are the most popular. ( See picture). Cabbage and lettuce row better in cool temperature, and they are easy to grow from seeds. (See: Prepared Vegetable Bed). Sow cabbage and lettuce seeds in pots or in loose soil beds covered with black plastic sheets in early spring and late summer. If you want in volume, use seed trays -- some has 50 holes in one tray. Growing broccoli, cauliflower, cabbage, and lettuce seedlings together in one tray is less work to do. Since roots need space to develop, your best bet is to choose trays with a bigger opening. Make sure to keep the seed soil moist.
(See: Grow Seeds in Pots and Make a Seed Bed).
(See: Grow Seeds in Pots and Make a Seed Bed).
Thin seedlings as they grow and transplant cabbage and lettuce seedlings 40 - 45 cm apart to their new beds when they grow four or five leaves.
Bugs feast on broccoli, cauliflower, cabbage, and lettuce. Net to keep the hungry bugs out.
A perfect combination is, to grow lettuce that needs moderate sunlight under the shade of broccoli trees. ( See picture).
 When harvesting lettuce picks mature leaves from each plant, leave the remaining leaves to grow. This will allow harvesting lettuces leaves over a period of time.


Need some veggie in mealtime?
A perfect combination is, to grow lettuce that needs moderate sunlight under the shade of broccoli trees. ( See picture).


Need some veggie in mealtime?
Grow leaf lettuce in a planter box and place the box where -- a kitchen window with some sunlight is a good place -- you can easily reach it.
( See picture) Pinch off the outer leaves, and enjoy in a salad, sandwich, burger, or the way you like it!
Grow Potatoes:

Buy seed potatoes with brown eyes --the small pits on the surface -- from a local shop. Leftover potatoes purchased from supermarkets can be used as seeds, but they may not yield many crops.
With a sharp knife slice the potatoes roughly into halves, making sure each piece has some eyes on it. Don`t cut small (Ping-Pong balls size) seed potatoes. Let cut potatoes sit in for a day or two --avoid direct sunlight -- for rot resistance.
Potatoes thrive in well-drained, loose soil and don`t need much liming. Take a soil sample test. If soil pH level is 6 to 7 range do nothing, otherwise sprinkle 50 gm lime per square meter over the plot, and mix lime with the soil. Wait for a week for the lime to settle.
Dig 15 cm wide and deep straight trenches. Spread and mix 2 kg of manure or compost and 100 gm of fertilizer per square meter in the bottom of the trench. Wait for a week or so before planting seed potatoes.
Plant seed potatoes 25 ~30 cm apart, eye side up and cover the trenches more than half with soil. Seeds potatoes contain water and don`t need watering until the shoots break the ground in a month or so after planting.
When shoots reach 15 ~ 20 cm tall, cut all, but two or three healthy stems per potato. Stem cutting produces bigger potatoes by sending extra nutrition to the tubers.
Toss 20 ~ 30 gm of fertilizer per square meter and hoe loose soil up around the base of the plants, and cover the roots and bury the stems halfway.
Water the ground if it is dry and continue hilling during the growing season until plants bloom. Be sure to keep the tubers covered, or sun will turn potatoes green and bitter. Potatoes should be ready for harvest in about three months.
Another way of planting:

If your feet sizes are somewhere between 25 ~30 cm., fast and easy way to plant potatoes is to stand inside the trenches, and drop seed potatoes one at a time near your heel and toe as you walk along the trenches. If your feet are not in that ranges, simply place seed potatoes inside the trenches with your hands 25 ~30 cm. apart. Gently put a hand full of fertilizer (to avoid seed burning make sure fertilizer don`t touch the potatoes) and a hand full of manure in between seed potatoes ( See picture). Cover the trenches more than half with soil, and mark the area to avoid waking on the newly planted area. ( See picture)


Do a test digging before harvesting all your potatoes. Gently dig up a potato plant (See picture below). If most tubers are small, potatoes are not yet ready for harvesting. Wait until tops of the vines start to die.


John Green. All Rights Reserved
No comments:
Post a Comment